一、Windows连接Linux
#第一种连接方式: 直接连接手动输入用户名和密码
[c:\~]$ ssh 10.0.0.7
#第二种连接方式: 指定用户名
[c:\~]$ ssh root@10.0.0.7
#第三种连接方式: 指定端口
[c:\~]$ ssh 10.0.0.41 2222
二、基于用户名和密码连接
#Linux可以连接到Linux
[root@web01 ~]#ssh  10.0.0.31
The authenticity of host '10.0.0.31 (10.0.0.31)' can't be established.
ECDSA key fingerprint is SHA256:jmToEI850uw7id+vmhN5XjMaT4diMiv3QD/BX6MK4ds.
Are you sure you want to continue connecting (yes/no/[fingerprint])? yes
Warning: Permanently added '10.0.0.31' (ECDSA) to the list of known hosts.

Authorized users only. All activities may be monitored and reported.
root@10.0.0.31's password:

Authorized users only. All activities may be monitored and reported.
Activate the web console with: systemctl enable --now cockpit.socket

Last login: Thu Dec  5 08:29:10 2024 from 10.0.0.1
[root@nfs ~]#
#指定用户连接
[root@web01 ~]# ssh root@10.0.0.31
#指定端口连接
[root@web01 ~]# ssh -p2222 10.0.0.41
三、ssh基于秘钥的方式远程连接
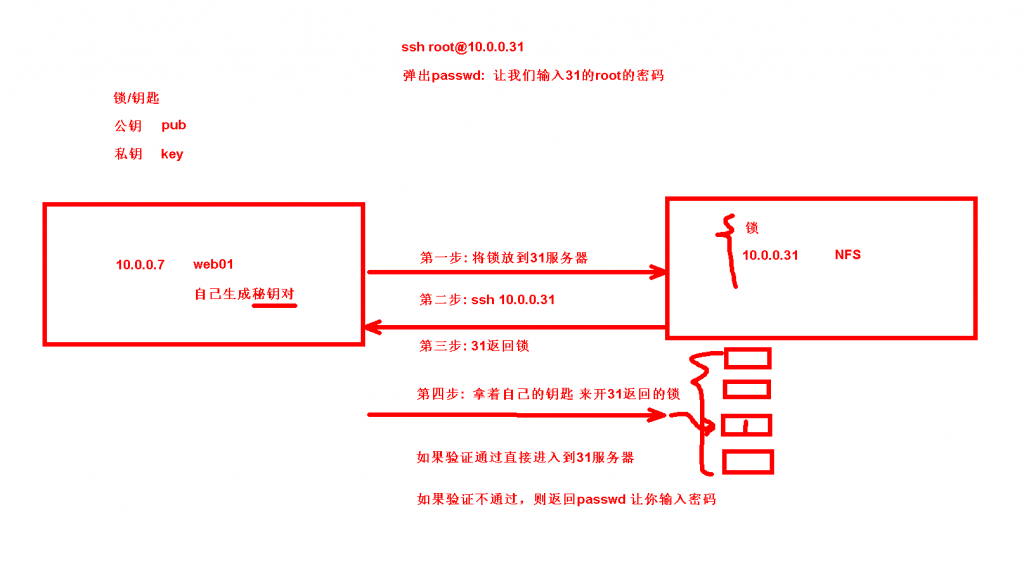
#web01免秘钥连接nfs服务器
1.web01生成秘钥对
[root@web01 ~]#ssh-keygen		#一路回车
Generating public/private rsa key pair.
Enter file in which to save the key (/root/.ssh/id_rsa):
Enter passphrase (empty for no passphrase):
Enter same passphrase again:
Your identification has been saved in /root/.ssh/id_rsa
Your public key has been saved in /root/.ssh/id_rsa.pub
The key fingerprint is:
SHA256:H3UzpNageTqyvEOozmoConqnNCP8y72zkjMAqQfaWdI root@web01
The key's randomart image is:
+---[RSA 3072]----+
|            . .  |
|           o =   |
| . .      o = =  |
|+ . E      = . o |
|+o +   .S +      |
|*.+   ...+ o     |
|=o= .. .o .      |
|oo=O+.  ..       |
|o+oOB++ ..       |
+----[SHA256]-----+

2.查看秘钥对
[root@web01 ~]#ll .ssh/
total 12
-rw------- 1 root root 2590 Dec  5 20:26 id_rsa
-rw-r--r-- 1 root root  564 Dec  5 20:26 id_rsa.pub

3.将公钥拷贝到nfs服务器
[root@web01 ~]#ssh-copy-id 10.0.0.31
/usr/bin/ssh-copy-id: INFO: Source of key(s) to be installed: "/root/.ssh/id_rsa.pub"
/usr/bin/ssh-copy-id: INFO: attempting to log in with the new key(s), to filter out any that are already installed
/usr/bin/ssh-copy-id: INFO: 1 key(s) remain to be installed -- if you are prompted now it is to install the new keys

Authorized users only. All activities may be monitored and reported.
root@10.0.0.31's password:

Number of key(s) added: 1

Now try logging into the machine, with:   "ssh '10.0.0.31'"
and check to make sure that only the key(s) you wanted were added.

4.连接到nfs服务器
[root@web01 ~]#ssh 10.0.0.31

[root@nfs ~]#ll .ssh
total 4
-rw------- 1 root root 564 Dec  5 20:30 authorized_keys
SSH远程连接注意事项
所有目录的权限必须正确:
[root@nfs ~]# ll -d /       # 根目录555
dr-xr-xr-x. 21 root root 276 Dec  5 10:30 /
[root@nfs ~]# ll -d /root   # 家目录权限为550
dr-xr-x--- 4 root root 154 Dec  5 10:30 /root
[root@nfs ~]# ll -d .ssh	# .ssh存放公钥和秘钥的目录 700
drwx------ 2 root root 48 Dec  5 10:45 .ssh
[root@nfs ~]# ll .ssh/	    #存放公钥的文件必须为600
total 8
-rw------- 1 root root 1129 Dec  5 10:48 authorized_keys

私钥的权限: 600
[root@web01 ~]# ll .ssh/
total 12
-rw------- 1 root root 2590 Dec  5 10:42 id_rsa
-rw-r--r-- 1 root root  564 Dec  5 10:42 id_rsa.pub
远程连接案例
需求:
1.xshell通过免秘钥连接10.0.0.7
2.nfs和backup都关闭公网网卡ens33 只留下172.16.1段
3.通过web01作为跳板机连接 backup和nfs服务器
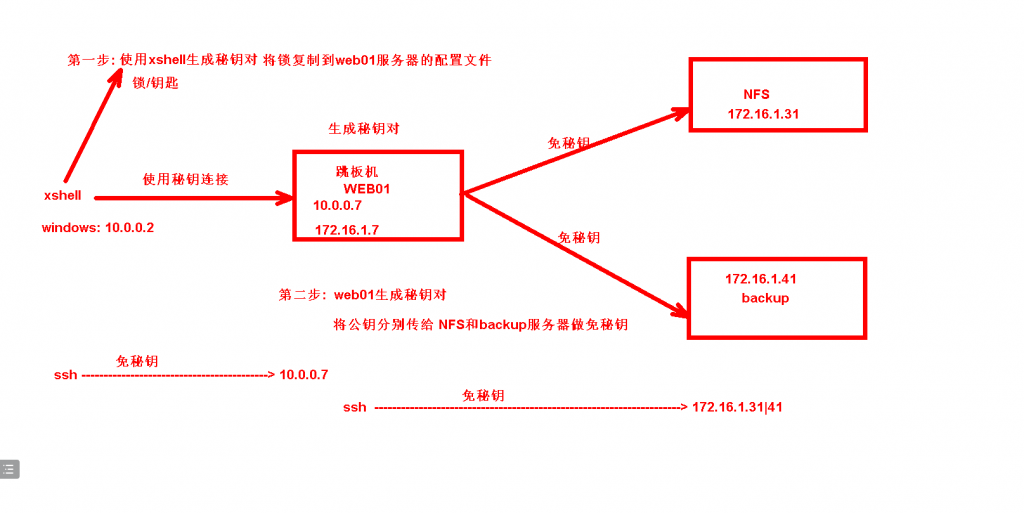
第一步:xshell生成秘钥对
xshell-->工具-->新建生成秘钥向导
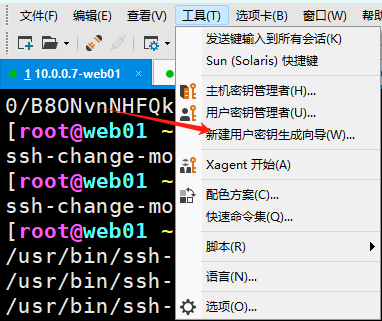
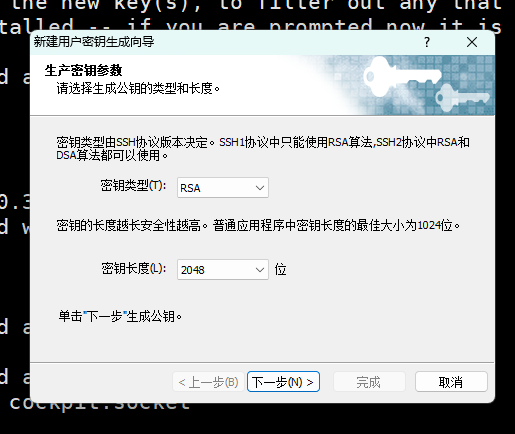
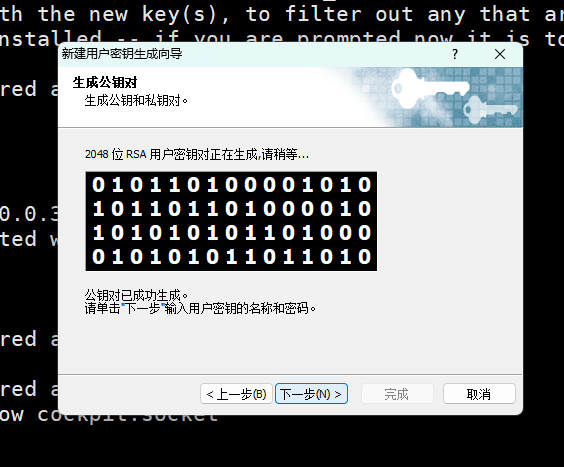
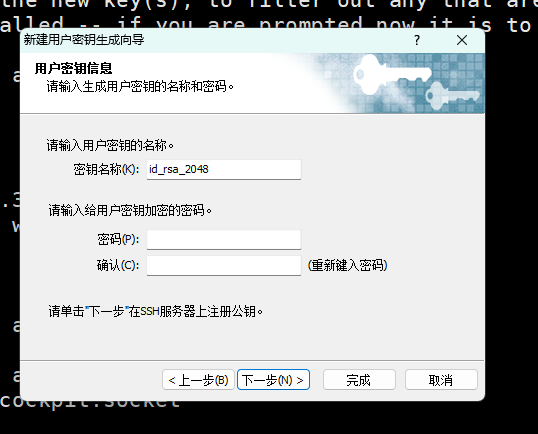
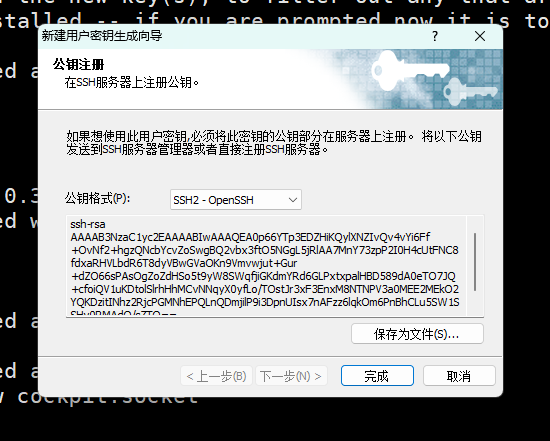
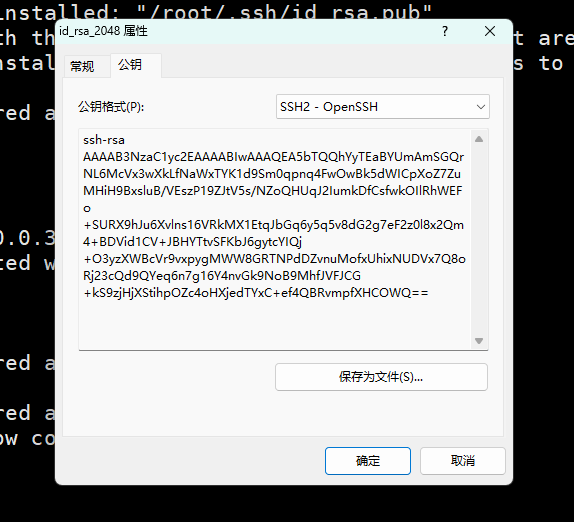
第二步: 将生成的公钥写入到web01服务器
[root@web01 ~]# vim .ssh/authorized_keys  # 将公钥粘贴到此文件中
[root@web01 ~]#ll .ssh/authorized_keys
-rw-r--r-- 1 root root 380 Dec  5 20:43 .ssh/authorized_keys
[root@web01 ~]#chmod 600 .ssh/authorized_keys
[root@web01 ~]#ll .ssh/authorized_keys
-rw------- 1 root root 380 Dec  5 20:43 .ssh/authorized_keys
第三步:windows使用秘钥连接服务器
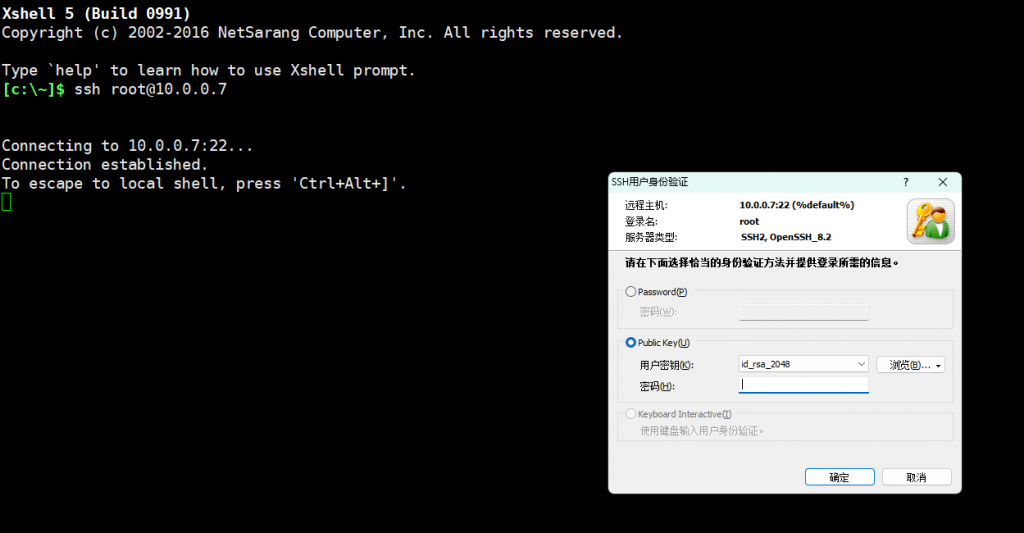
修改ssh配置文件禁止root和密码登录
[root@web01 ~]# awk 'NR==66' /etc/ssh/sshd_config
PasswordAuthentication no
[root@web01 ~]# systemctl restart sshd
通过WEB01和nfs及backup服务器做免秘钥
第一步: web01生成秘钥对
[root@web01 ~]# ssh-keygen
第二步: 将公钥拷贝到 172.16.1.31和41
#拷贝的过程中要31和41的root密码
[root@web01 ~]# ssh-copy-id 10.0.0.31
[root@web01 ~]# ssh-copy-id 172.16.1.41

第三步: 远程连接登录测试
[root@web01 ~]# ssh 172.16.1.41


Comments NOTHING